


PLANMECA USA
Tools of the Implant Journey
Planmeca ProMax 3D is the starting point in a fast and predictable path toward digital implant treatment planning
 A picture is worth a thousand words. But in dentistry, that depends on what you can do with the picture. Can you magnify it and adjust the contrast? Merge it with a digital impression? See depth as well as height? When you consider the implant workflow—from a CBCT image and intraoral scan to designing a 3D-printed surgical guide and milling the final restoration—a picture, even if it’s a high-quality 3D image, is just the beginning.
Dr. Zachary Evans, an assistant professor who is board certified in periodontics and implant dentistry, can remember a not-too-distant past when relying on 2D radiographs, manually creating prosthetic designs, pouring up stone models, and doing physical waxups in the lab was the norm.
“That process would take hours,” he shared, adding that in just 5 or 10 years, that has changed significantly. “Using Planmeca tools, I can now plan an implant case and have a surgical guide to the printer in around 15 minutes.”
A patient’s journey through implant treatment requires more than just an image…it takes a team of technologies that work together harmoniously to provide fast and predictable treatment. Here, Dr. Evans takes us along on his daily implant planning journey utilizing a digital implant workflow from Planmeca.
Step 1: Diagnosis Starts with an Image
Ultra Low Dose radiation is a trademark feature of Planmeca imaging systems, but so is image quality, especially when it comes to treatment planning. “Diagnosis is the most important part of our treatment planning,” said Dr. Evans. “And part of that diagnosis, especially when we’re planning an implant case, is capturing a very high-quality CBCT image of our patient.”
Capturing that image with the Planmeca ProMax 3D Mid— an all-in-one unit that combines 3D imaging, 3D photo, digital 2D panoramics, and cephalometry—means a few things to Dr. Evans. Image clarity and resolution are essential to see what bone and adjacent anatomy look like, as well as to get an overall assessment of the implant area. And from a diagnostic standpoint, the Planmeca ProMax 3D Mid also allows him to see detail not always captured in traditional 2D radiographs. Dr. Evans often identifies pathology that may have otherwise been missed, such as such as incipient maxillary molar periapical lesions.
Many implant experts would argue that CBCT imaging for implant surgery should be considered the standard of care. Ideally, Dr. Evans said clinicians should be using 3D images for implant planning, as the greater amount of data can lead to better outcomes. But he also recognizes that there is a risk to the patient from radiation exposure.
“Using Planmeca’s Ultra Low Dose imaging protocol, I’m able to capture good diagnostic images while limiting the radiographic exposure down to what’s maybe the equivalent of having traditional 2D x-rays,” he said.
Step 2: Capturing the Anatomy
After gathering 3D information for the bone and hard tissue, Dr. Evans needs to overlay it with a digital model of what the teeth and soft-tissues look like. Using the Planmeca Emerald intraoral scanner, it takes 1 to 2 minutes to scan the arch where he’s planning the implant as well as scan the opposing arch. He also captures a digital bite registration.
“With this information, I have everything I need to think about the restorative vision and the future,” he said. “Coming up with an ideal restorative plan allows us to more accurately plan where the ideal implant position would be.”
Step 3: Adding in the Magic
For Dr. Evans, the magic is in the software. Planmeca Romexis imaging software ties the entire implant workflow together—from 3D image to intraoral scan to digital waxup—often in a matter of a few clicks. After using design tools to digitally wax up the tooth, he merges the digital waxup with the CBCT image and intraoral scan.
“So, now, I have an almost perfect representation of what the ideal eventual restoration will look like, and we’ve factored in the occlusal forces, emergence profile, gingival margin—all of these things that are really critical to think about when we plan where an ideal implant position would be.”
Next, he can choose from a robust implant library contained within Planmeca Romexis. Virtually every implant system exists within the software, and after adding the implant into the treatment plan, it’s time to design and print a 3D surgical guide to use on the day of the surgery.
"Using Planmeca tools, I can plan an implant case and have a surgical guide to the printer in around 15 minutes."
-Zachary Evans, MS, PhD, DMD
Step 4: Surgery and Restoration
The Planmeca Creo C5 printer can print a surgical guide in as few as 10 minutes. “The Planmeca Creo C5 is a very fast printer—that’s probably its biggest advantage. There’s nothing on the market that comes close to it in speed right now. Within a matter of minutes, we can have a surgical guide in hand,” said Dr. Evans.
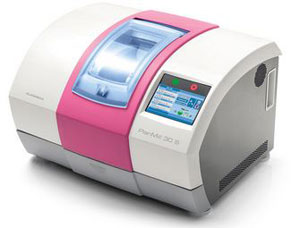
With the Planmeca product portfolio, after completing surgery with the 3D-printed surgical guide, the final restoration can be milled with the Planmeca PlanMill 30 S. The newest edition to the Planmeca milling family, the single-spindle unit serves as an entry point into chairside milling. It has recently been upgraded via software updates which has sped up the milling process significantly—an important factor for practices that mill the majority of their restorations in-house.
Pick a Partner—Not a Product
 There’s constant competition among dental manufacturers when it comes to 3D imaging, intraoral scanners, milling machines, and design software. But while there’s no shortage of products, there is a shortage of partners who offer a completely integrated digital implant workflow.
“Planmeca has created a package of hardware, software, and 3D-printing technology that all ties in together through a really impressive software suite and platform that makes it possible to pull things off predictably.”
One of Planmeca’s biggest strengths, according to Dr. Evans, is that the company allows its software and systems to operate on an open platform. This means that after creating a digital waxup for an implant case, for example, you can export it out of Planmeca Romexis to fabricate a temporary restoration and send it to a 3rd-party or other 3D-printer without incurring additional fees or challenges.
“This open framework, for me, is what separates Planmeca from its competitors. It’s refreshing to work with a system that gives you this kind of freedom,” he said.
The Implant Treatment Plan in Action
Dr. Evans illustrates a recent "everyday" case planning for edentulous spaces 19 and 20 using the complete digital implant workflow from Planmeca. Tooth No. 18 was mesially tipped without adequate space for 2 crowns and lacking adequate bone for a large diameter implant and single crown. Through digital planning and waxing of the restorations, a precision enameloplasty was performed on the adjacent teeth to create adequate space for 2 implants.


